Category: Safety

  • How to Make a Candle Last Longer – Without Risky Hacks

    The best way to make a candle last longer is not a freezer trick or a homemade fix. A well-maintained candle usually gives its best performance when the wick is prepared correctly, the flame is protected from draughts, burn sessions stay within the maker’s guidance and the candle is stored properly between uses.

    There is an important distinction here: making a candle last longer should not mean forcing it to burn more slowly than it was designed to, extending a burn beyond its stated limit or trying to recover every last trace of wax.

    The aim is simply to avoid wasting wax through poor burning conditions or maintenance.

    The simple rule: help the candle burn as its maker intended rather than trying to redesign it at home.

    What actually helps a candle last longer?

    • Follow the candle’s own burning instructions.
    • Prepare the cold wick before lighting.
    • Keep the flame away from draughts and strong air movement.
    • Avoid unnecessarily short or excessively long burn sessions.
    • Keep wick trimmings, matches and other debris out of the wax.
    • Store the candle away from excessive heat and direct sunlight.

    None of those is particularly dramatic, which is probably why they receive less attention online than freezer, foil and other candle hacks. They are also the things that matter most.

    Start with the instructions on the candle

    A container candle is a combination of wax, fragrance, wick and vessel that should have been designed and tested to work together.

    Before the first light, check the candle’s label or care instructions for:

    • the recommended wick length;
    • any maximum burn time;
    • the amount of wax that should remain when use is discontinued;
    • any product-specific safety instructions.

    These instructions matter more than a generic rule found online because wick sizes, vessels and formulations vary.

    If the candle has an estimated total burn time, treat that number as an estimate rather than a stopwatch guarantee. How a candle performs can vary with its design, maintenance and the conditions in the room.

    Prepare the wick before each burn

    Check the wick while the candle is completely cold.

    If the maker tells you to trim it to a particular length, use that measurement. Remove loose char or an obvious carbon build-up before lighting.

    A wick that has become too long can produce a larger or less stable flame, which may increase soot and change the way the candle consumes its wax.

    But shorter is not automatically better. Cutting a wick excessively short can leave it struggling to maintain a useful flame or eventually submerged in melted wax.

    The objective is therefore not to trim as much as possible. It is to maintain the wick at the length specified for that candle.

    Keep the wax pool clean

    After trimming, remove the clipped wick rather than leaving it on the candle.

    Matches, wick fragments and other debris should also be kept out of the melt pool. Once material falls into liquid wax it can interfere with the way the candle burns, and combustible debris close to a flame introduces an unnecessary hazard.

    This is one of the standard candle-use precautions included in British industry guidance.

    Choose a calm place for the flame

    Where you burn a candle can have a noticeable effect on how evenly it uses its wax.

    Place it upright on a stable, heat-resistant surface and keep it away from open windows, fans, air-conditioning vents and other strong air currents.

    A draught can push the flame to one side instead of allowing it to burn steadily above the wick. That can contribute to uneven melting, flickering and soot.

    It also matters where several candles are used together. Do not crowd burning candles closely or place them beside another strong heat source. Follow any spacing guidance provided with the product.

    Avoid very short burns when you can

    Repeatedly lighting a container candle for only a few minutes can leave much of the wax around the outside untouched while the centre repeatedly melts.

    Over time, this can contribute to an uneven burn and leave usable wax stranded around the sides of the vessel.

    That does not mean every burn must continue until the surface has melted perfectly to the edge.

    The maker’s maximum burn time still comes first. If the candle has reached that limit, extinguish it even if some solid wax remains around the edge.

    Never keep a candle burning beyond its stated limit simply to make the melt pool look perfect.

    Longer burn sessions are not always better

    The opposite extreme can cause problems too.

    As a candle burns, carbon can build up on the wick and the vessel accumulates heat. Excessively long sessions can result in a larger flame, smoking or a hotter container.

    That is why a candle’s maximum session time is a safety instruction rather than a suggestion for getting the most value from the wax.

    Extinguish the candle at the stated limit and allow it to cool fully before preparing it for another burn.

    Do you need a full melt pool every time?

    No.

    A full melt pool can be a useful description of how some container candles perform, but it should not become a target that overrides the candle’s instructions.

    If wax remains around the sides when the recommended burn time has been reached, extinguish the candle rather than continuing indefinitely.

    Some residual wax can simply be part of how a candle performs under particular conditions.

    If your candle repeatedly burns down the middle and leaves a substantial wall of wax, our guide to uneven-burning candles explains what may be happening and what to check next.

    Does trimming the wick make a candle last longer?

    It can help the candle burn in a more controlled way, but wick trimming is not a trick for artificially slowing the candle down.

    A properly maintained wick helps maintain the flame behaviour the candle was designed for. An excessively long wick may develop a large flame and consume wax differently, while a wick trimmed too short can create its own problems.

    Use the maker’s stated wick length rather than assuming that the shortest possible wick will produce the longest possible burn.

    Should you put a candle in the freezer?

    Do not freeze a complete candle in an attempt to make it burn longer.

    The idea usually comes from the claim that colder or harder wax will burn more slowly. That does not make freezing a finished candle a useful general care technique.

    The National Candle Association specifically advises against freezing candles in its educational guidance, noting that handling candles at very low temperatures can cause cracking and loss of integrity.

    You may sometimes see separate advice about putting an empty candleholder in a freezer to help remove leftover wax. That is a different task from freezing a finished candle before burning it.

    For normal storage, follow the maker’s instructions and keep the candle in a cool, dry place rather than deliberately freezing it.

    What about the aluminium foil candle trick?

    You may have seen videos showing aluminium foil wrapped around the top of a burning candle to encourage wax at the edges to melt.

    It is not something we recommend as a general candle-care technique.

    A candle and its vessel should be used in the configuration for which they were designed. Adding an improvised cover around a burning candle can change how heat is retained around the container and is unnecessary if the candle is otherwise performing correctly.

    If a candle is tunnelling badly, extinguish it and investigate the cause rather than modifying the burning vessel while a flame is present.

    Store candles properly between uses

    Good storage will not magically double a candle’s burn time, but it can help preserve the candle’s condition between uses.

    Once the candle is completely extinguished and the wax has cooled and solidified, store it upright in a cool, dry place away from strong sunlight and excessive heat.

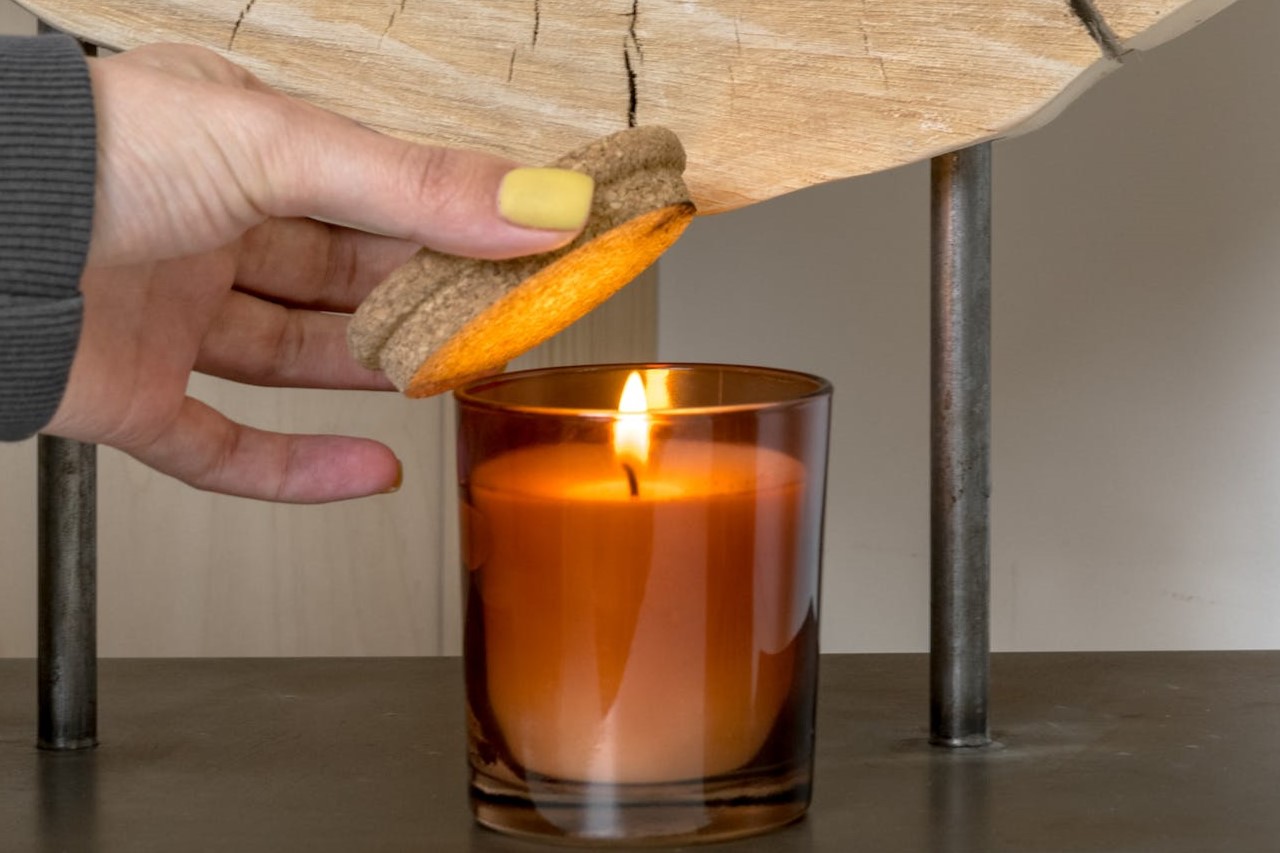
    If a lid or dust cover was supplied for storage, use it once the candle is cold. This helps keep dust and debris off the wax and wick.

    Avoid leaving candles for long periods on sunny windowsills, above radiators or in hot vehicles.

    Do not try to burn every last bit of wax

    Trying to extract the maximum number of minutes from a candle can eventually work against safe use.

    As the flame reaches the bottom of a container, there is less wax between the flame and the base of the vessel. Many manufacturers therefore specify that burning should stop while some wax still remains.

    Follow the minimum remaining-wax instruction supplied with your candle.

    Leftover wax is not necessarily wasted wax. In a container candle, that final amount can form part of the product’s safety margin.

    How to get the best life from a candle

    There is no single hack that turns a well-designed candle into one that burns twice as long.

    The useful habits are much less exciting:

    • read the instructions before lighting;
    • maintain the wick at the stated length;
    • keep debris out of the wax;
    • burn on a stable surface away from draughts;
    • avoid repeatedly cutting burn sessions unnecessarily short;
    • never exceed the maximum session time;
    • store the candle properly between uses;
    • stop using it when the maker tells you to.

    Those habits may not make for a dramatic social-media video, but they give a candle the best chance to use its wax evenly and perform as intended.

    Frequently asked questions

    Does putting a candle in the freezer make it last longer?

    It is not a recommended way to extend a finished candle’s burn time. Follow the manufacturer’s storage guidance instead and keep the candle in a cool, dry place.

    Does trimming a candle wick save wax?

    Maintaining the wick at the correct length helps keep the flame controlled and supports the candle’s intended burn. Do not trim it shorter than the maker recommends simply to try to reduce wax consumption.

    Should candle wax reach the edge of the jar?

    Not at the expense of exceeding the candle’s maximum burn time. If the recommended session is over, extinguish the candle even if some solid wax remains at the edge.

    Why does my candle burn quickly?

    Candle burn rate depends on the complete design of the candle, but an overlong wick, draughts or unsuitable burning conditions can affect flame behaviour. Start by checking the wick, the candle’s position and the maker’s instructions.

    Is leftover wax at the bottom normal?

    Yes. Container candles are often designed to stop burning before every trace of wax has been consumed. Follow the minimum remaining-wax instruction supplied with the candle rather than trying to burn it completely dry.

    Sources and further reading

  • Why Should You Trim a Candle Wick?

    Trimming removes the fragile, carbonised tip of a used wick. That helps the next flame remain controlled and reduces common problems such as an oversized flame, soot and loose debris in the wax.

    What happens when a wick is too long?

    A wick controls how much melted wax reaches the flame. When the exposed wick is excessively long—or carries a large carbon cap—it can feed a taller, less stable flame. The candle may flicker, smoke, soot the glass or heat the vessel more than intended.

    Wick length is only one part of candle design. Wax, fragrance, vessel diameter and wick construction work as a tested system. Never swap the wick or add material to make it burn more strongly.

    When should you trim it?

    Check the wick before every burn, when the candle is completely cold. A used cotton wick often has a dark, brittle tip that lifts away easily. Wooden-wick instructions can differ, so follow the maker’s stated length rather than assuming one measurement suits all candles.

    If the wick is still glowing, embedded in liquid wax or warm to the touch, leave it alone. Trimming hot wax can introduce fragments and pull the wick off centre.

    How to trim a candle wick

    Use clean wick trimmers or small scissors that give you control.

    1. Let the candle cool until the wax is fully solid.
    2. Remove any loose carbon with a clean tool, taking care not to drop it into the jar.
    3. Trim to the candle maker’s recommended length; many candles specify roughly 5 mm, but the label takes priority.
    4. Keep the cut level and avoid tugging the wick.
    5. Clear all fragments before lighting.

    Can a wick be too short?

    Yes. An over-trimmed wick may struggle to light or can drown as the melt pool forms. Do not dig out wax, pour it away or insert paper or another improvised wick. Let the candle cool and contact the maker for product-specific advice.

    If the wick repeatedly becomes submerged or the candle burns unevenly, the issue may involve the candle’s design or previous burn history, not simply your trimming technique.

    Trimming is maintenance, not a cure-all

    A correctly trimmed wick cannot compensate for a strong draught, debris in the wax, a damaged vessel or excessively long burn sessions. Place the candle away from open windows and air vents, and observe the maximum session time printed on its label.

    If the flame remains unusually high after the wick has been prepared correctly, extinguish it, let it cool and stop using it until you understand the cause. Our full candle care guide brings the main checks together.

    Frequently asked questions

    Do I trim a brand-new candle?

    Check the label and the wick as supplied. If it is longer than the maker’s starting recommendation, trim it while cold; otherwise leave it as prepared.

    Should I trim a wick after or before burning?

    Before the next burn, once the wax and wick are completely cold. That makes debris easier to remove safely.

    Why does my wick form a mushroom shape?

    The carbon cap can form when more fuel reaches the flame than it burns cleanly. Let the candle cool and remove the brittle cap before relighting.

    The simple rule: inspect the cold wick before every burn, follow the candle maker’s stated length and stop if the flame still behaves unusually.

  • Will Candles Melt in a Hot Car?

    Yes, candles can soften, slump or melt in a hot car. A closed vehicle in sunshine can become far hotter than the outdoor air, while candle waxes soften across different temperature ranges. Never leave a candle—or a child, pet or heat-sensitive item—in a parked car.

    Why cars are hard on candles

    Sunlight passes through the windows and warms the dashboard, seats and enclosed air. Wax near a window can receive both hot air and direct radiant heat. Because wax blends differ, there is no single temperature at which every candle fails.

    Even when wax does not turn fully liquid, it can shift inside the jar, deform a pillar, loosen decoration, move the wick or cause fragrance oil to migrate. Labels and packaging can also lift or fade.

    Is a melted candle ruined?

    Not automatically, but it must be assessed once completely cool. A cosmetic dip is different from a cracked vessel or displaced wick. Do not light the candle while the wax is soft and do not put it in a freezer to speed recovery.

    Let it stand upright at normal room temperature. Inspect the glass, base, wick position and wax surface. If the wick is near the side, the vessel is damaged, liquid has leaked or the product looks separated, do not burn it; ask the maker for advice.

    How to transport candles in warm weather

    • Take candles indoors at every stop; the boot is not temperature-controlled.
    • Keep jars upright in a snug box with dividers or soft padding.
    • Place the box out of direct sunlight and away from heater vents.
    • Use an insulated carrier for a longer trip, without putting ice directly against glass.
    • At the destination, let the candle settle before unwrapping and inspecting it.

    What not to do

    Do not reshape a container candle with a knife, remelt it in an oven or microwave, or add a replacement wick. A candle’s safe performance depends on its original tested arrangement.

    For a freestanding pillar, a small heat mark may be mainly visual, but distorted bases and exposed or shifted wicks can make it unstable. Retire it if it cannot sit level in a suitable holder.

    Better storage at home

    Keep candles upright in a cool, dry, shaded cupboard away from radiators and sunny windows. Stable conditions are kinder than repeated hot-cold cycles. Use the lid or protective cover supplied once the candle is cold.

    If wax develops an unexpected surface change, compare it with our guide to mould and other candle surface changes before assuming the worst.

    Frequently asked questions

    At what temperature do candles melt?

    It depends on the wax blend and finished product. Avoid using one internet temperature as a guarantee for every candle.

    Can I refrigerate a candle after it melts?

    Rapid cooling can create condensation or stress the vessel. Let it return to room temperature gradually.

    Can I still burn a candle with a shifted wick?

    Not if the wick is off centre or close to the glass. Contact the maker; do not try to reset it yourself.

    The simple rule: never use a parked car as candle storage—keep the product upright, shaded and with you, then inspect it after any heat exposure.

  • What Is a Candle Warmer and How Does It Work?

    A candle warmer releases fragrance by melting scented wax with heat instead of using a flame. It can be a useful way to enjoy a candle in some settings, but it is still a hot electrical appliance—not a risk-free shortcut.

    The two main kinds of candle warmer

    A top-down lamp warmer uses a bulb above the candle to melt the upper layer of wax. A warming plate heats a jar or wax dish from underneath. Wax-melt burners are related, but they are designed for loose wax melts rather than every type of jar candle.

    The distinction matters. Top-down warmth usually creates a shallow melt pool near the fragrance. A plate can warm the base and container for longer. Use only a candle or wax product that the appliance maker says is compatible; size, vessel material and clearance all matter.

    • Lamp warmer: check bulb type, shade height and jar clearance.
    • Plate warmer: check permitted vessel materials and maximum diameter.
    • Wax-melt burner: use only in the dish provided; never balance a candle on it.

    How a candle warmer releases scent

    Candle wax contains fragrance that becomes more volatile as the wax warms. Once the surface softens or melts, scented molecules move into the surrounding air. There is no burning wick, so there is no flame consuming the wax.

    The wax may appear to last indefinitely, but the fragrance does not. Over time the warmed top layer can smell weaker even though plenty of wax remains. Follow the warmer instructions for switching off, cooling and, if recommended, removing a small amount of spent surface wax.

    Is a candle warmer safer than a flame?

    It removes an open flame, which changes the risk, but it does not remove risk. The bulb, plate, melted wax, cable and vessel can become hot. Electrical faults, unstable surfaces, trailing leads and unattended use can all cause harm.

    Put the warmer on a stable, heat-resistant surface with ventilation around it. Keep it away from children, pets, curtains, bedding and water. Do not move it while the wax is liquid, and never leave it running when you leave the room or go to sleep. Follow the appliance instructions ahead of general internet advice.

    Which candles work with a warmer?

    Choose a candle that fits without touching the shade or lamp hardware and is expressly permitted by the warmer manufacturer. Avoid cracked, chipped or unusually shaped containers. A candle designed only to be burned may not perform as expected when repeatedly heated.

    If you alternate between warming and burning, inspect the wick before lighting. It should be correctly positioned, free from debris and trimmed according to the candle maker’s instructions. Read our candle care guide before returning to a flame.

    Candle warmer or traditional burn?

    A warmer suits people who want fragrance without a visible flame. Burning gives the familiar living flame and follows the candle’s tested wick-and-wax system. Neither method is automatically better: the right choice depends on the product instructions, the setting and the experience you want.

    Whichever you choose, stop if the vessel cracks, the appliance smells electrical, the wax spits, or anything behaves unexpectedly. Let everything cool before touching it.

    Frequently asked questions

    Does a candle warmer use up the wax?

    The wax usually melts rather than being consumed by a flame. Its fragrance will still fade, so remaining wax is not a guarantee that useful scent remains.

    Can any jar candle go on a warmer?

    No. Check both the warmer and candle instructions. Vessel size, shape and material can make a candle unsuitable.

    Can I leave a candle warmer on overnight?

    No. Treat it as a hot electrical appliance: use it only while awake, present and able to supervise it.

    The simple rule: choose a purpose-made warmer, follow both sets of instructions and treat hot wax with the same respect you would give a lit candle.

  • When Should You Stop Burning a Candle?

    When Should You Stop Burning a Candle?

    Stop burning a candle when it reaches the minimum wax level on its label, reaches its maximum burn-session time, or shows signs of a problem—whichever happens first. A candle can still contain wax and have reached the end of its usable life.

    That can feel counterintuitive. Your favourite candle still smells lovely, there is wax around the sides, and the wick will probably light again. Surely there is another evening in it?

    The useful distinction is between wax that remains and wax you can safely burn.

    How much wax should you leave?

    Many container candles specify about 13 mm (½ in) of wax remaining. Some smaller formats specify less. Use the figure on your candle’s label.

    Check the depth while the candle is cold, before lighting it. With an uneven burn, a thick rim of wax around the glass can make the candle look fuller than it is. Pay attention to the lower area around the wick: wax higher up the sides does not restore the depth beneath it.

    If an opaque vessel makes the level difficult to judge, check the label rather than probing hot wax. If the instructions are missing or unclear, contact us before relighting a nearly empty candle.

    Some candles are designed to extinguish themselves with wax remaining. That leftover quantity is not a second stopping measurement, and you should not wait for the flame to go out by itself. The labelled stopping depth remains your instruction.

    Why the final layer matters

    As the wax level falls, the flame sits closer to the base. Burning beyond the intended stopping point can expose the vessel and supporting surface to excessive heat. A wick that shifts towards the side can also concentrate heat against the glass.

    The Scottish Fire and Rescue Service warns that burning candles down to the bottom can cause their containers to crack or break.

    Rapid temperature changes can also stress glass—a process called thermal shock—so let a hot jar cool naturally.

    A jar surviving previous burns does not tell you how it will behave when almost empty.

    Stop for the evening, or retire the candle?

    These are different decisions.

    Pause the burn when you reach the maker’s maximum session time, need to leave the room, or are going to bed. An otherwise sound candle may be suitable for another burn once fully cool.

    Investigate before relighting if the candle produces persistent smoke, repeatedly flares, or develops a flame leaning towards the glass. Extinguish it, let it cool, then check the wick length and position, loose debris and nearby draughts. The National Candle Association’s burning guide explains how long or crooked wicks and debris can contribute to soot, uneven burning and flare-ups.

    Retire the candle when it reaches its remaining-wax limit or the vessel is cracked or chipped. Cooling does not make damaged glass suitable for another burn. If a wick has detached or shifted towards the glass, stop using the candle and contact the maker.

    Do not test the jar by touch

    Candle vessels become hot during use. Touching one cannot establish whether it is safe.

    Do not lift the jar to inspect its base or see how long you can hold a finger against it. Follow the depth and session limits, and respond to visible problems. You should not have to wait for scorching or cracking to know when to stop.

    Three temptations that lead to burning too far

    1. “The wax around the sides still needs to melt”

    A candle may burn down through the centre while leaving a wall of wax around the edge. Short burns can contribute to this tunnelling, particularly early in its life.

    Follow the maker’s first-burn guidance, but keep within the maximum session time even if the edges have not melted. An existing tunnel is not a reason to leave the candle burning indefinitely.

    If the centre has reached the stopping depth, the surrounding wax does not buy another burn. Avoid improvised foil covers or scraping wax towards a live flame. Let the candle cool and seek the maker’s troubleshooting advice.

    2. “A bigger flame will sort it out”

    A long wick can produce a larger flame, which may look as though it will finally melt stubborn wax. It can also bring more smoke and uneven burning.

    Before lighting, trim the cold wick to the length specified on the label and remove the offcuts. If the candle starts smoking persistently, extinguish it before making any adjustment. Keeping the wick longer to force a wider melt pool is not a safe correction.

    3. “The other wicks still have wax left”

    Multi-wick candles need attention across the whole wax surface. Light the wicks the label tells you to light, rather than choosing individual wicks to stretch out the candle’s life.

    As a cautious practical rule, stop the whole candle when the area around any wick reaches the specified minimum. Do not keep the other flames going to chase a more even finish.

    Tea lights and pillars need different checks

    Tea lights are too shallow for a jar-candle depth rule to be useful. Follow their own stopping and burn-time instructions, and use a suitable holder. London Fire Brigade warns that tea lights can become hot enough to melt through plastic surfaces. Their metal cups alone do not protect a bath edge or furniture.

    Pillars and tapers need a secure, suitable holder and enough remaining height to keep the flame clear of it. Follow the stopping point on the label; there is no single remaining-height rule for every design. If instructions are missing, ask the maker and stop conservatively while the candle remains securely supported, before the flame approaches the holder. Stability alone does not establish a safe stopping depth.

    What about a candle warmer?

    Do not assume a warmer is safe because the jar is nearly empty. Follow both the candle maker’s and warmer maker’s instructions. If either prohibits the combination or gives no guidance establishing compatibility, do not use it.

    Never heat a cracked or chipped jar, and do not light the wick while using a warmer.

    How to end the burn safely

    For an ordinary burn:

    1. Use a snuffer or the extinguishing method specified by the maker. Never use water, which can make hot wax splatter.
    2. Check that every flame is out and the wicks have stopped glowing.
    3. Leave the candle in place until both the wax and vessel are fully cool.

    Once the candle is cold, follow the maker’s disposal guidance. Consider vessel reuse only if the container is undamaged and suitable for its intended new purpose. Clean it only when fully cold, and do not refill it with wax unless it was designed for that use.

    There is no need to achieve an empty jar. A little wax left behind is an ordinary part of finishing a candle safely.

  • Why You Shouldn’t Put Out Candles with the Lid

    Why You Shouldn’t Put Out Candles with the Lid

    What is the best way to put out a candle? In most cases, use a candle snuffer or gently blow out the flame, then check that the wick is no longer glowing.

    Using the candle’s ordinary storage lid is not usually the method we recommend unless the manufacturer specifically says that the lid has been designed for extinguishing the flame.

    And one method should always be avoided: never use water to put out a candle.

    How to Put Out a Candle Safely

    Extinguishing a candle is simple, but doing it carefully helps prevent hot wax from splashing, keeps the wick in better condition and makes sure the flame really is out before you leave the room.

    The simplest methods are:

    • use a candle snuffer
    • gently blow out the flame
    • use another extinguishing method only if the candle manufacturer specifically recommends it

    Afterwards, check the wick carefully. A flame may disappear while the tip of the wick continues to glow, so make sure it is completely extinguished.

    Do not touch or move the candle until the wax and vessel have cooled.

    Can You Put Out a Candle with the Lid?

    Sometimes — but only if the lid is intended to be used that way.

    Covering a flame removes its supply of oxygen, which will eventually extinguish it. That does not mean every decorative or storage lid should automatically be used as a candle snuffer.

    Candle lids are made from different materials and are designed in different ways. Some manufacturers specifically sell metal lids that can safely extinguish the flame, while others explicitly warn customers not to use their lids for this purpose.

    The sensible rule is therefore to follow the instructions supplied with your individual candle.

    If the manufacturer does not say that the lid is suitable for extinguishing, use a snuffer or gently blow the flame out instead.

    Why We Prefer Not to Use the Candle Lid

    For a normal container candle, the lid is primarily useful after the candle has cooled.

    Using a separate snuffer keeps a hot, sooty lid away from the wax and removes any uncertainty about whether the lid material was designed to be exposed directly to a flame.

    Once the candle has completely cooled, replace the lid to help keep dust, wick trimmings and other debris away from the wax.

    The Best Ways to Put Out a Candle

    1. Use a candle snuffer

    A candle snuffer is designed specifically for the job.

    Place the bell of the snuffer carefully over the flame until it goes out, then remove it once you are sure the wick is no longer burning.

    This method avoids blowing directly onto the pool of liquid wax and is particularly useful for candles with larger or deeper containers.

    2. Gently blow out the flame

    Despite some common candle advice online, gently blowing out a candle is an acceptable way to extinguish it.

    The important word is gently. Blowing forcefully across a large pool of hot liquid wax can cause splashing.

    Blow steadily towards the flame, check that the wick is completely out and leave the candle undisturbed while it cools.

    3. Use a lid only when instructed

    If the candle manufacturer explicitly states that its lid is designed to extinguish the candle, follow those instructions.

    Otherwise, do not assume that a decorative glass, wooden or metal lid is intended to be placed over a burning candle.

    Never Put Out a Candle with Water

    Water is one extinguishing method you should avoid completely.

    Pouring water onto hot candle wax can cause the wax to splatter. The sudden temperature change may also damage a hot glass container.

    If you need to extinguish a normal candle, use a snuffer or gently blow it out instead.

    Should You Use a Wick Dipper?

    A wick dipper is another candle-care tool sometimes used to extinguish a flame.

    It works by briefly pushing the burning wick into the liquid wax, cutting off the flame, before lifting the wick back into an upright position.

    If you use one, return the wick to the centre before the wax begins to set.

    A snuffer is simpler for most people, but both tools avoid blowing directly across the melted wax pool.

    Why Is My Candle Smoking After I Put It Out?

    A small amount of smoke immediately after extinguishing a candle is normal. The hot wick can continue releasing vapour for a short time after the flame disappears.

    If your candle produces excessive smoke while it is actually burning, the problem may instead be a wick that is too long or a flame being disturbed by a draught.

    Once the candle has cooled, trim the wick to around 6 mm / ¼ inch before lighting it again.

    What Should You Do After Extinguishing a Candle?

    Once the flame is out:

    • check that the wick has stopped glowing
    • leave the candle on its heat-resistant surface
    • do not touch or move the vessel while it is hot
    • allow the wax to cool and solidify
    • replace the lid only once the candle has cooled
    • trim the wick before the next burn

    A Few Other Candle Safety Basics

    • Never leave a burning candle unattended.
    • Keep candles away from children and pets.
    • Keep them away from curtains, bedding, paper and other materials that can catch fire.
    • Avoid open windows, fans and other draughts.
    • Place the candle on a stable, heat-resistant surface.
    • Keep the wax pool clear of matches and wick debris.
    • Follow the manufacturer’s recommended maximum burn time.
    • Do not burn a container candle all the way to the bottom.

    For more detail, see our complete Candle Care Guide.

    So, How Should You Extinguish a Candle?

    For most candles, the answer is straightforward: use a candle snuffer or gently blow out the flame.

    Do not use water, and do not assume that the candle’s lid is designed as an extinguisher unless the manufacturer specifically tells you that it is.

    Then check that the wick is completely out and allow everything to cool before moving or covering the candle.

    It only takes a few seconds, but it is one of the most important parts of good candle care.


    More candle guides: read our Candle Care Guide, learn how to fix an uneven-burning candle, or find out where to place scented candles safely.